Installation


Need help?
You've got this.
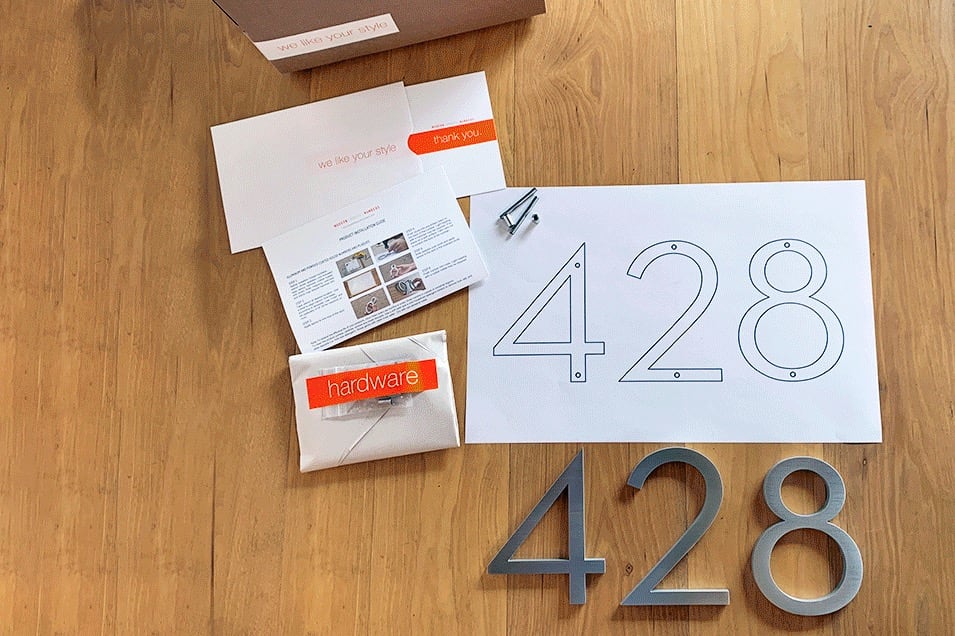
For a worry-free install, get acquainted with our step-by-step installation instructions! With your number, letter, or plaque order, we’ll include instructions, mounting hardware, and a handy drilling template. For decals, it doesn’t get any easier than peel-and-stick! Ready? Set! Go time!
Installation Instructions
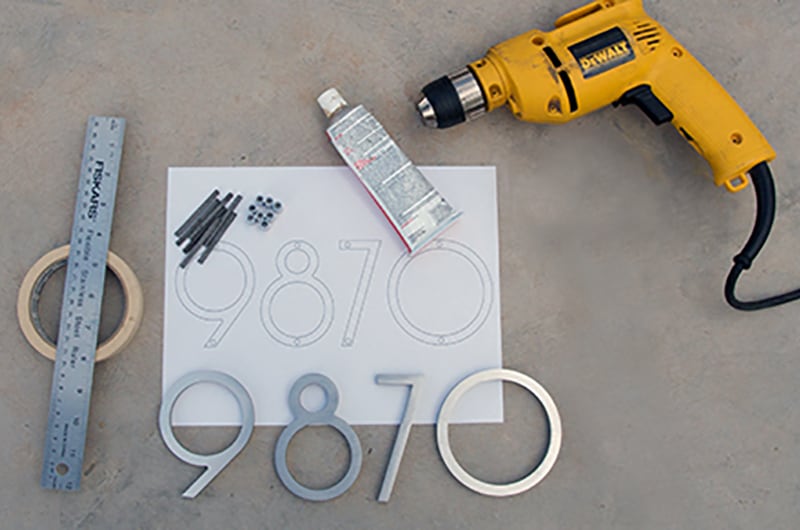
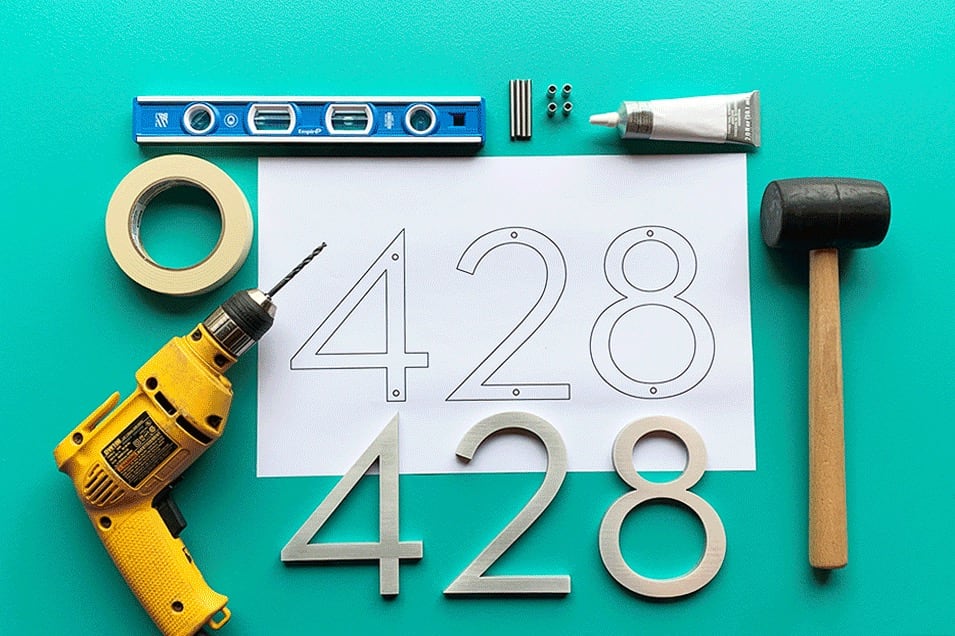
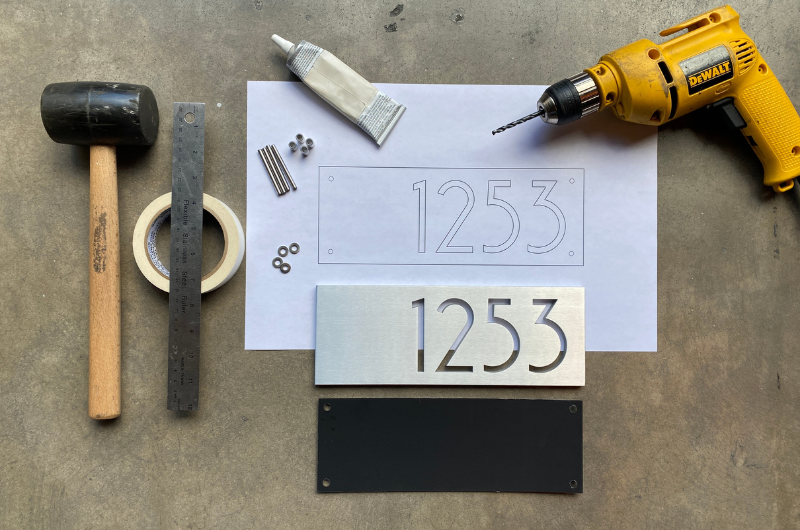
Gather supplies: house numbers, template, studs, spacers, (not included: tape, clear, quick-dry epoxy, rubber mallet, drill, level). Masonry surfaces may require a hammer drill.
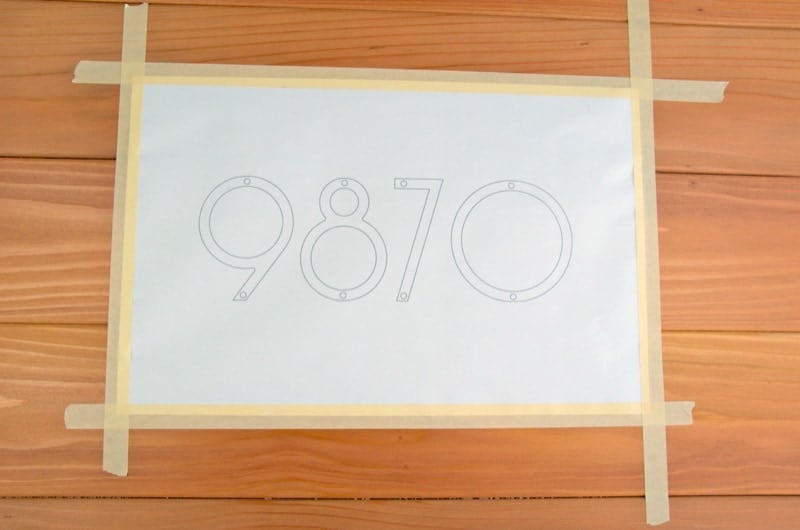
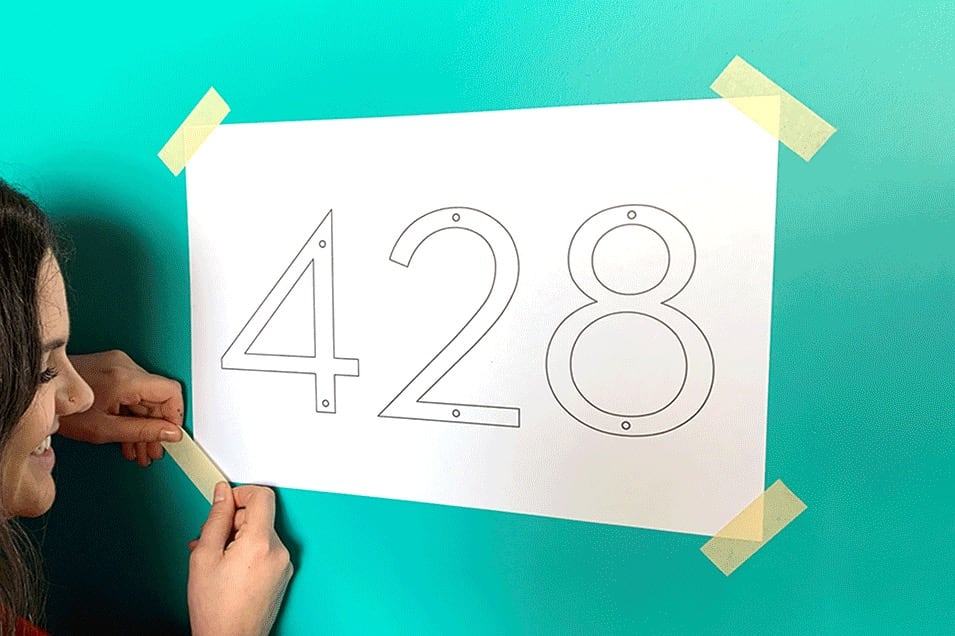
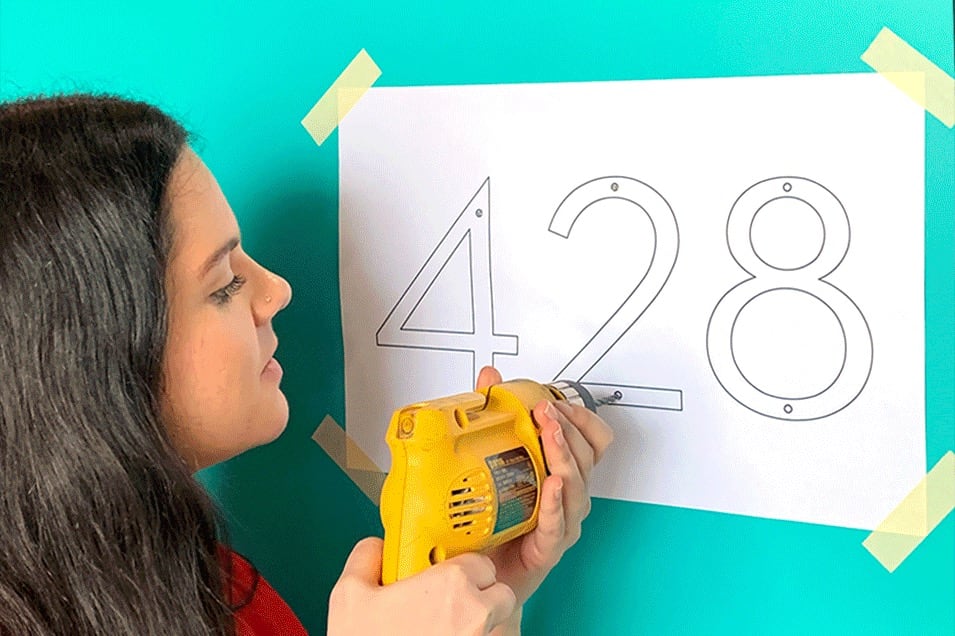
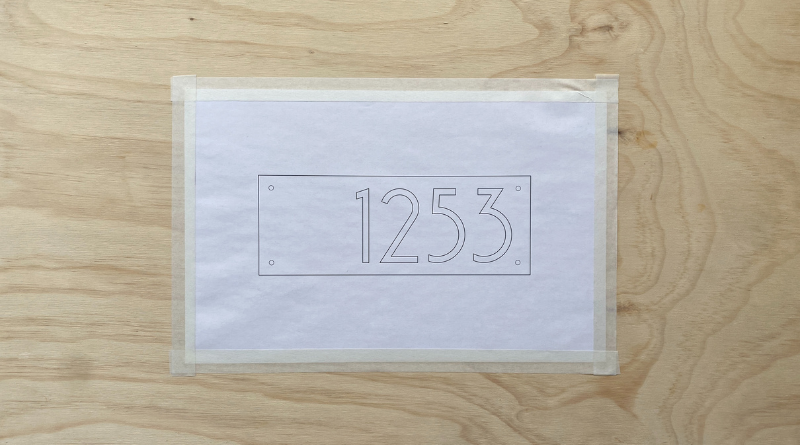
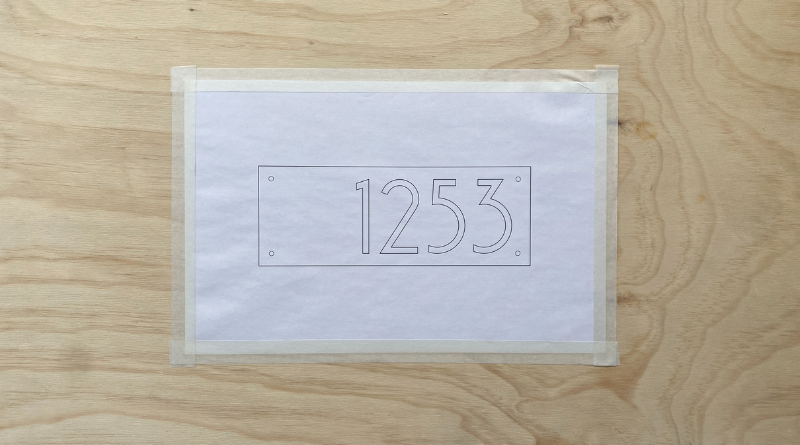
Tape template at desired location. Use a level to align template. Drill holes according to template. Use 11/64” drill bit or specialty 3/16” bit for masonry and rock. Carefully remove template.
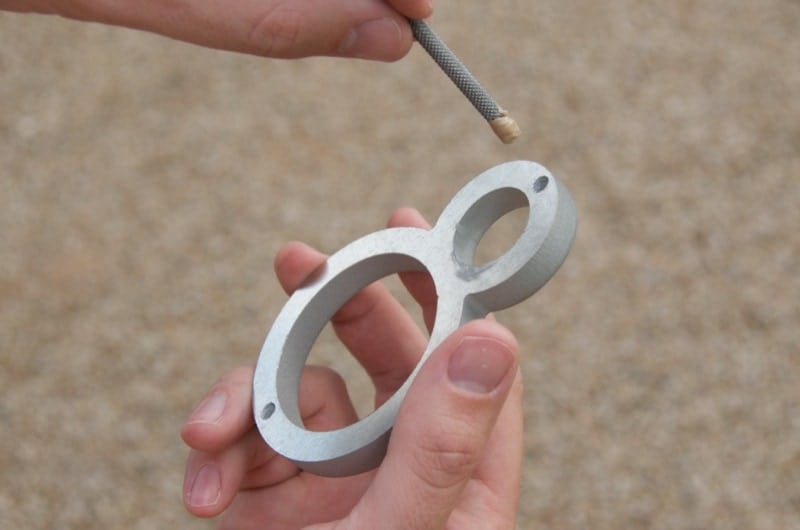
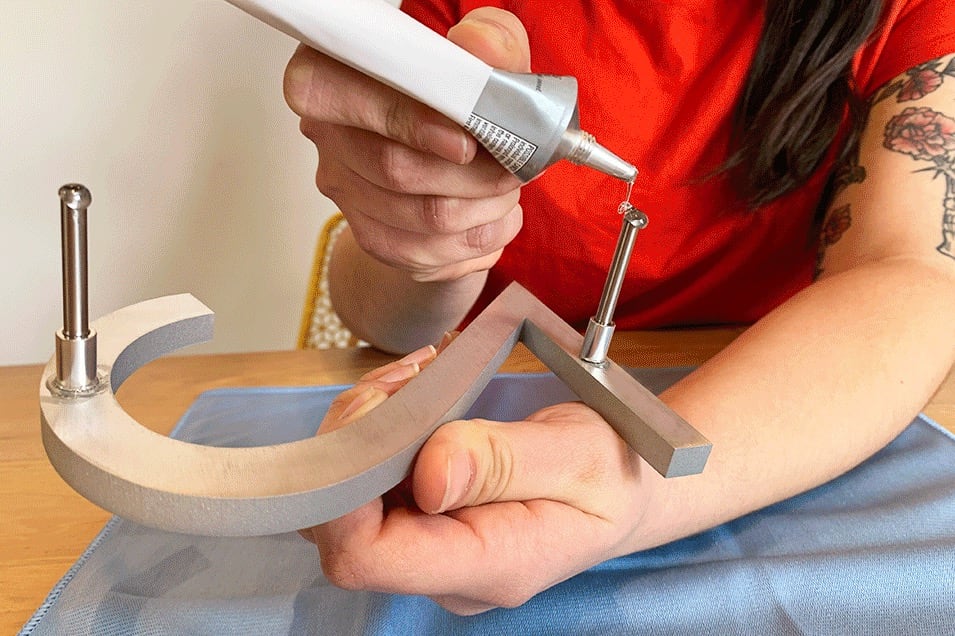
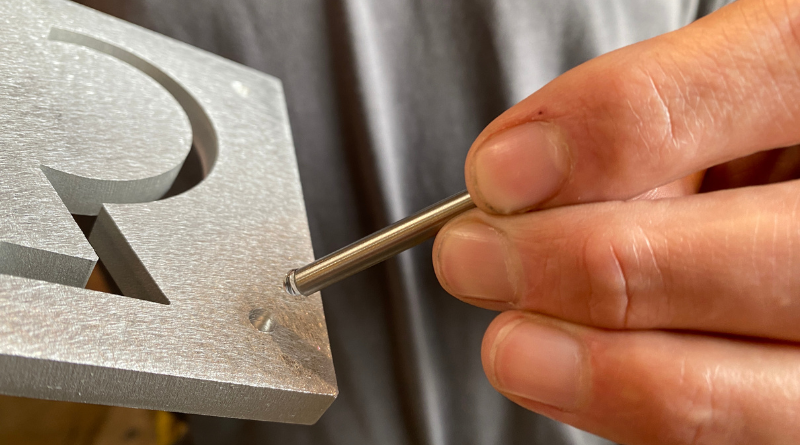
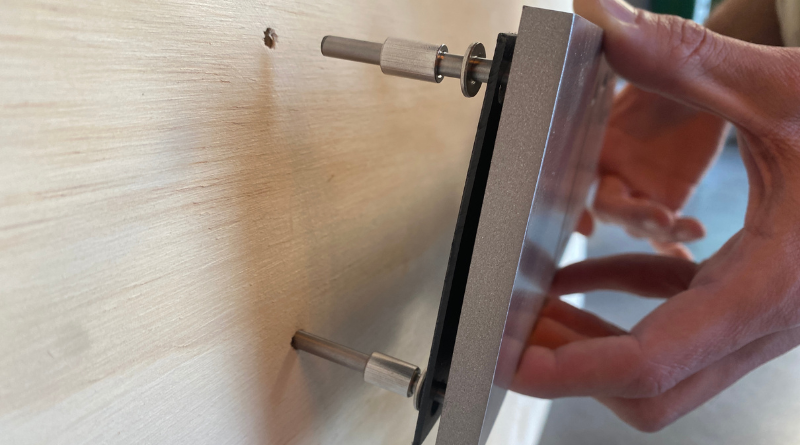
Apply a thin layer of epoxy to one end of the stud.
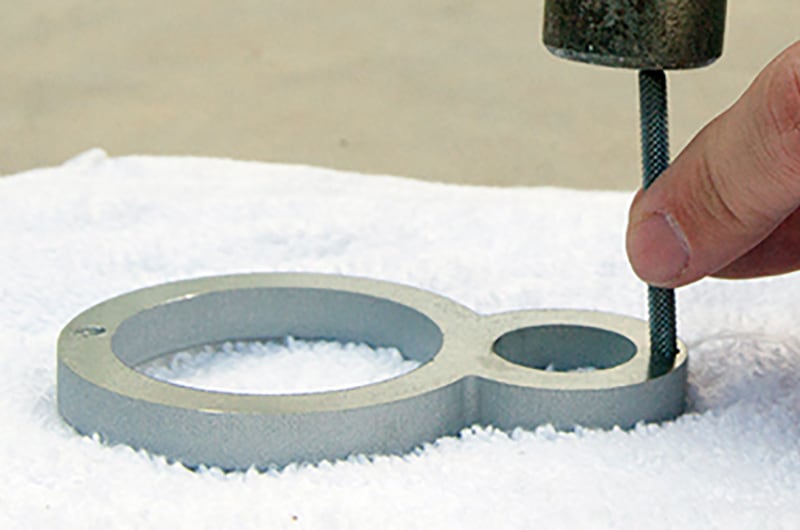
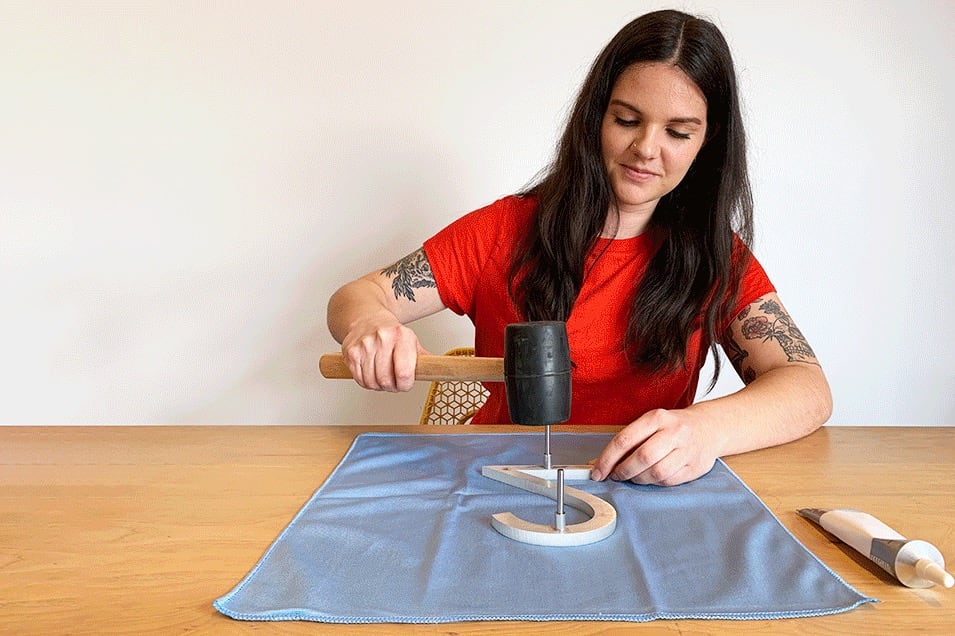
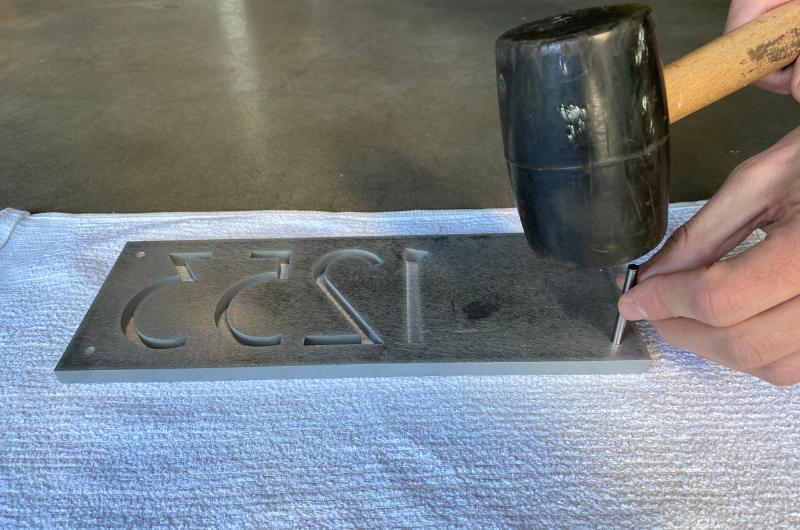
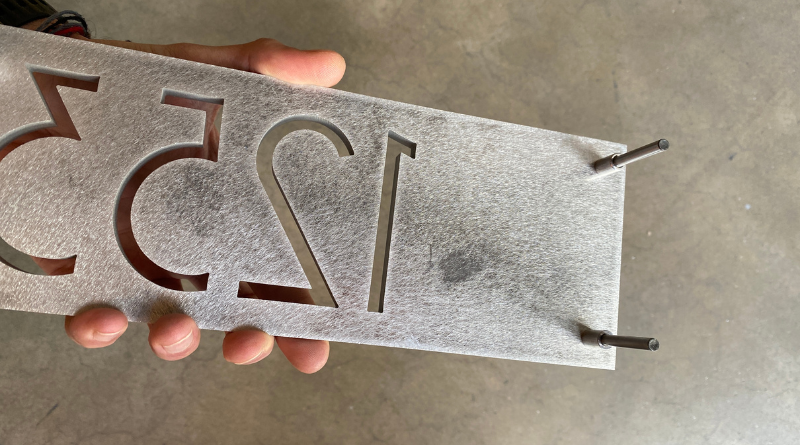
Push studs into pre-drilled holes on the back of the number. Light tapping may be required. If so, place on a soft surface. Take care not to scratch the face of the number.
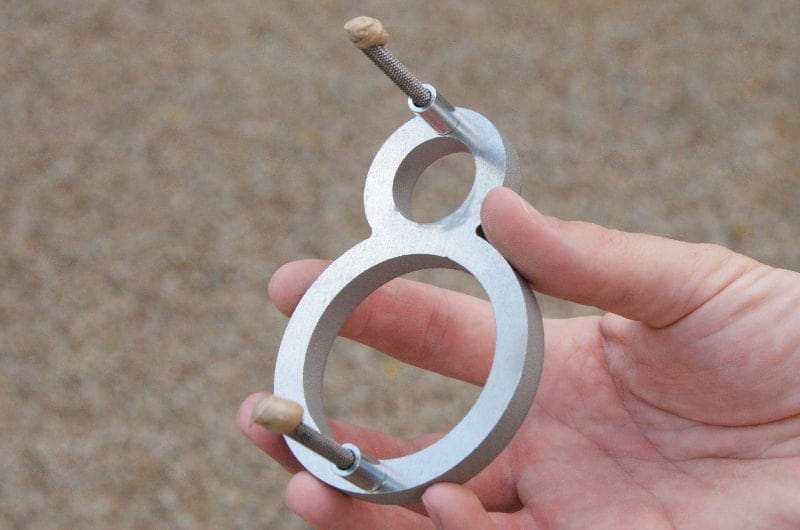
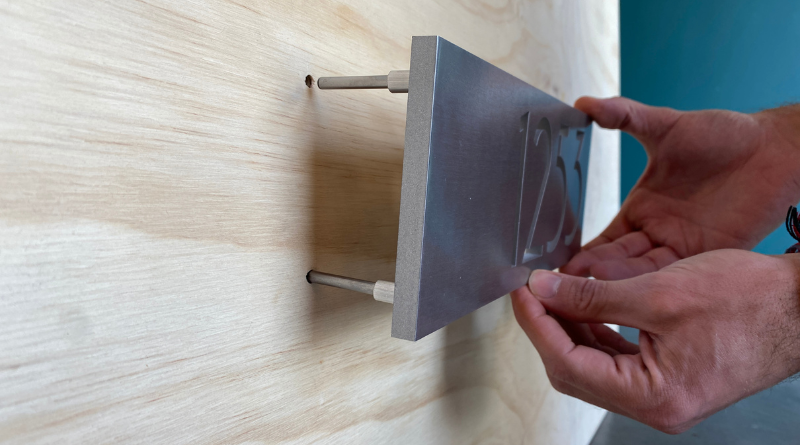
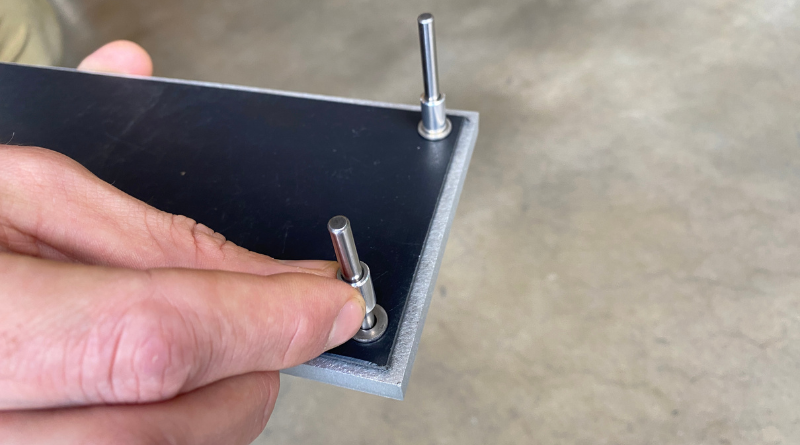
Slide spacers over studs. Apply a thin layer of epoxy to the end of the exposed studs.

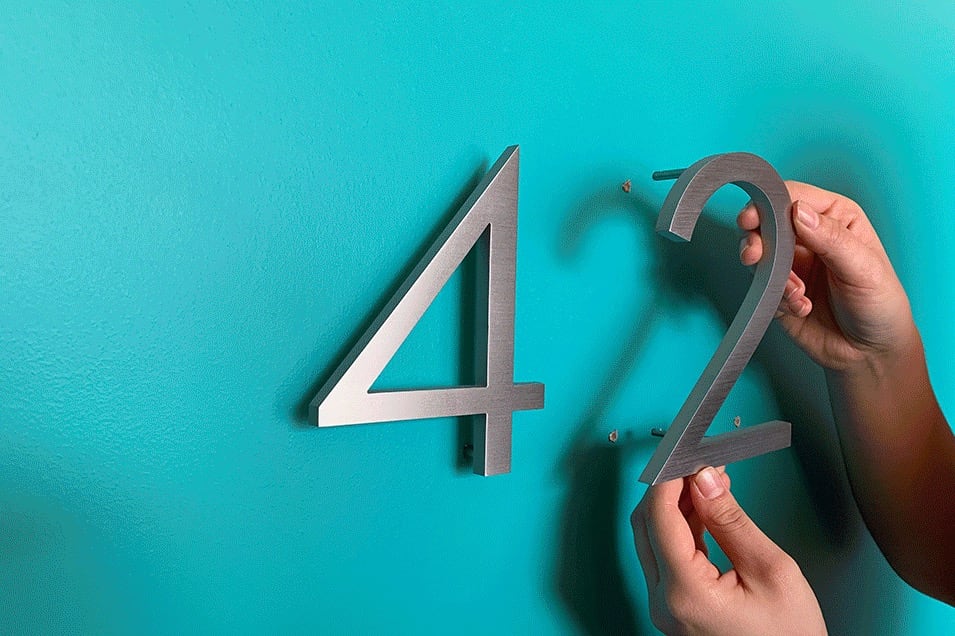
Push number into holes. Light tapping with a rubber mallet may be required. Take care to not scratch the face of the number. Note: Steel studs must be fully encapsulated to protect from the elements.
CARING FOR YOUR PRODUCTS: To extend the effective life of your numbers, clean them every six months or every three months in coastal or industrial regions. Use a soft cloth and a mild household detergent solution to remove dust, salt, and other deposits. Rinse gently with clean, fresh water. Dry with non-abrasive towel.
Modern House Numbers: How to Install Your Numbers and Letters, Step-by-Step!
Gather supplies: plaque, template, studs, spacers, (not included: tape, epoxy, rubber mallet, drill, level). Masonry, concrete, and stone installations may require a hammer drill.
Tape template at desired location. Use a level to align template. Drill holes according to template. Use 11/64” drill bit or specialty 3/16” bit for masonry and rock. Carefully remove template.

Apply a thin layer of epoxy to one end of the stud. Push studs into pre-drilled holes on the back of plaque.
Place plaque on a soft surface to avoid scratching. Lightly tap studs into holes, if necessary.
Slide spacers over studs. Apply a thin layer of epoxy to the end of the exposed studs.
Push plaque into holes. Light tapping with a rubber mallet may be required. Take care to not scratch plaque face. Note: Steel studs must be fully concealed to protect from the elements.
CARING FOR YOUR PRODUCTS: To extend the effective life of your plaque, clean every six months or every three months in coastal or industrial regions. Use a soft cloth and a mild household detergent solution to remove dust, salt, and other deposits. Rinse gently with clean, fresh water. Dry with non-abrasive towel.
Plaque Install Guide
Gather supplies: plaque, contrast plate, washers, studs, and spacers. (not included: tape, epoxy, rubber mallet, drill, level). Masonry, concrete, and stone installations may require hammer drill.
Tape template at desired location. Use a level to align template. Drill holes according to template. Use 11/64” drill bit or specialty 3/16” bit for masonry and rock. Carefully remove template.
Apply a thin layer of epoxy to one end of the stud. Push studs into pre-drilled holes on the back of plaque.
Place plaque on a soft surface to avoid scratching. Lightly tap studs into holes, if necessary.
Slide contrast plate over studs so it rests behind plaque. Then add washers, followed by spacers. Apply a thin layer of epoxy to the end of exposed studs.
Push plaque into holes. Light tapping with a rubber mallet may be required. Take care to not scratch plaque face. Note: Steel studs must be fully concealed to protect from the elements.
CARING FOR YOUR PRODUCTS: To extend the effective life of your plaque, clean every six months or every three months in coastal or industrial regions. Use a soft cloth and a mild household detergent solution to remove dust, salt, and other deposits. Rinse gently with clean, fresh water. Dry with non-abrasive towel.
Plaque with Contrast Plate Installation Guide
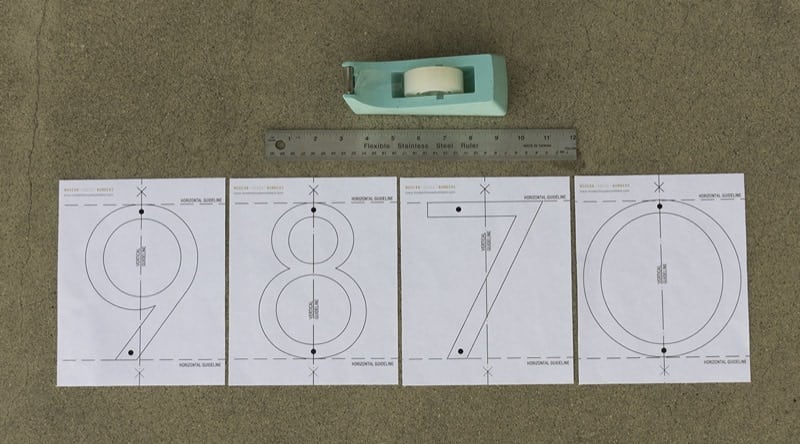
Arrange individual paper templates in desired order. Gather supplies: tape and ruler (not included). For horizontal arrangement, go to step 2A. For vertical arrangement, skip to step 3A.
Align templates horizontally using labeled guidelines at top and bottom.
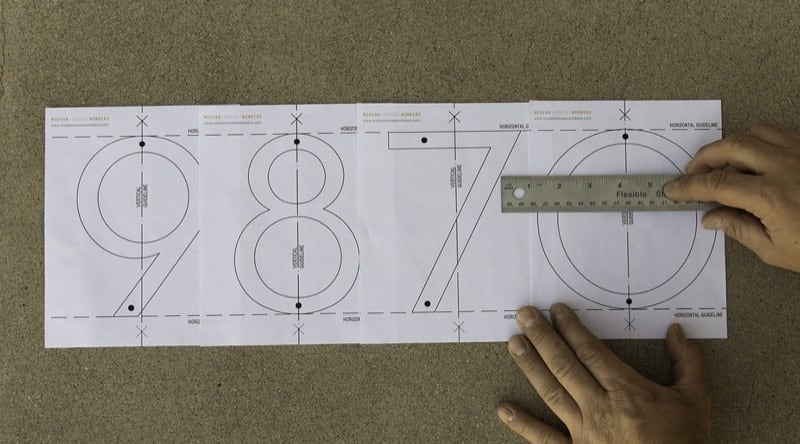
Determine spacing between each number within the available installation area. Use a ruler to measure the space between each number. Skip to step 4.
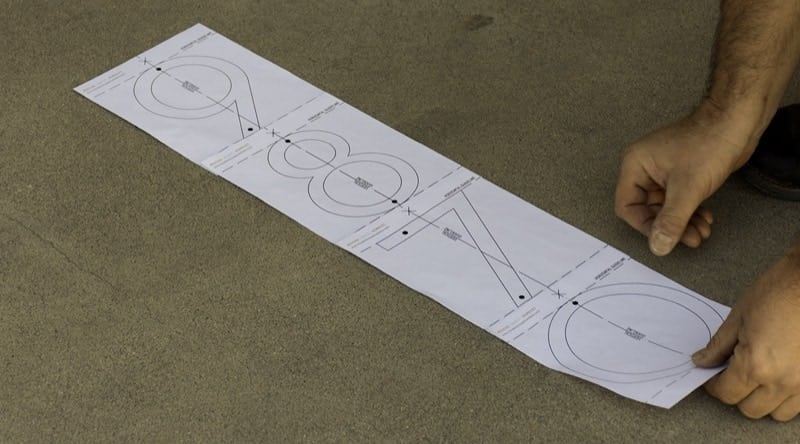
Align templates vertically using labeled vertical guideline.
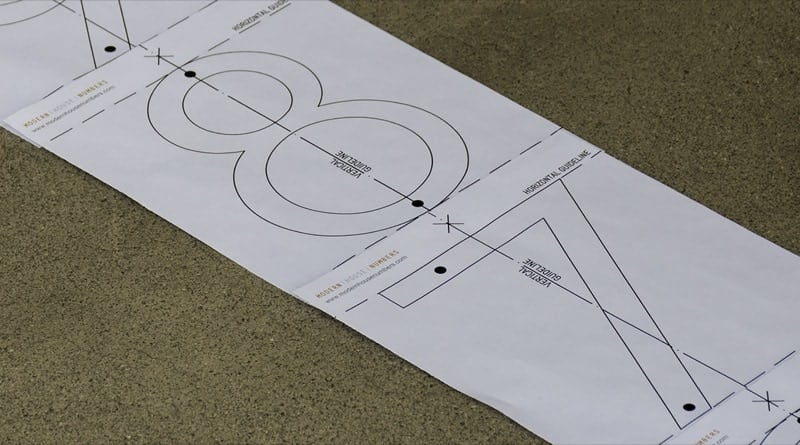
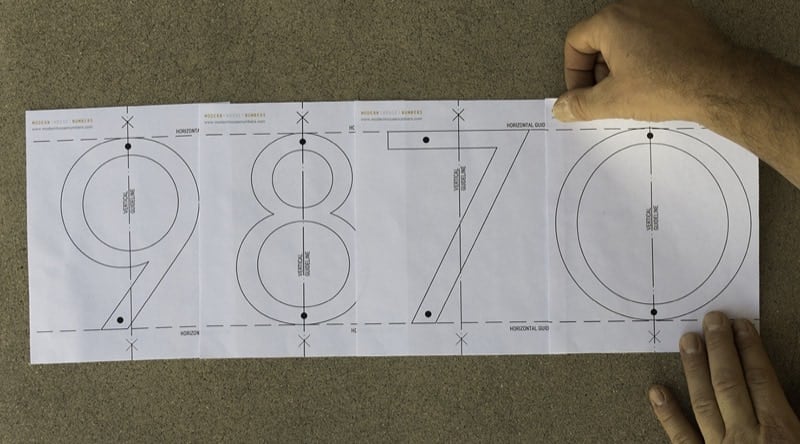
Align “X” marks on each template at top and bottom to achieve equal spacing between each number. Keep vertical guidelines aligned. Overlap of paper template edges is to be expected.
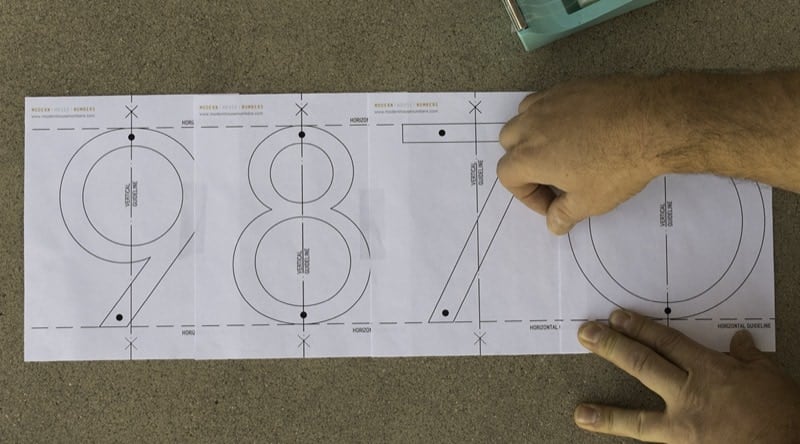
Use clear tape to connect individual templates together. Keep guidelines straight, maintain your desired spacing. This is your drilling guide. Overlap of paper template edges is to be expected.
Continue to Numbers Installation »
How to Install Modern QuickShip House Numbers, Letters & Symbols: Easy Step-by-Step Guide

Gather supplies: mailbox numbers, (not included: tape, and ruler). Note: decals should not be applied on rough surfaces or in wet, freezing conditions.
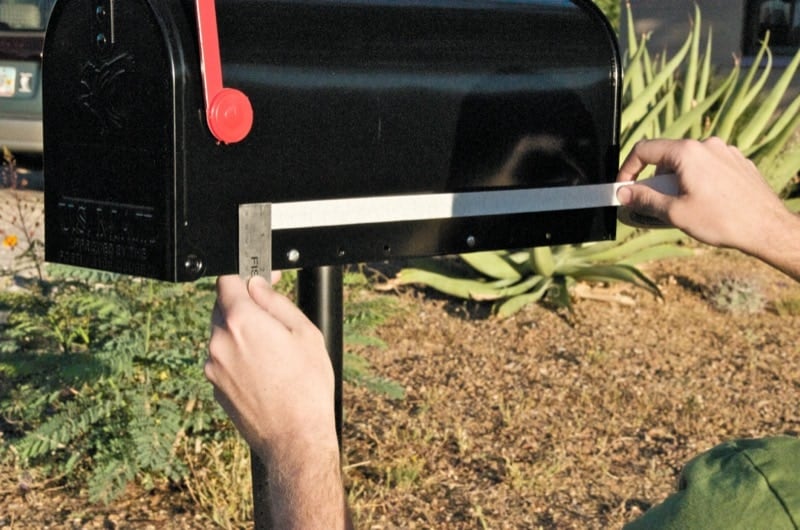
Clean and dry the mailbox surface. Measure the desired number location. Place a piece of tape to align the bottom edge of the numbers.
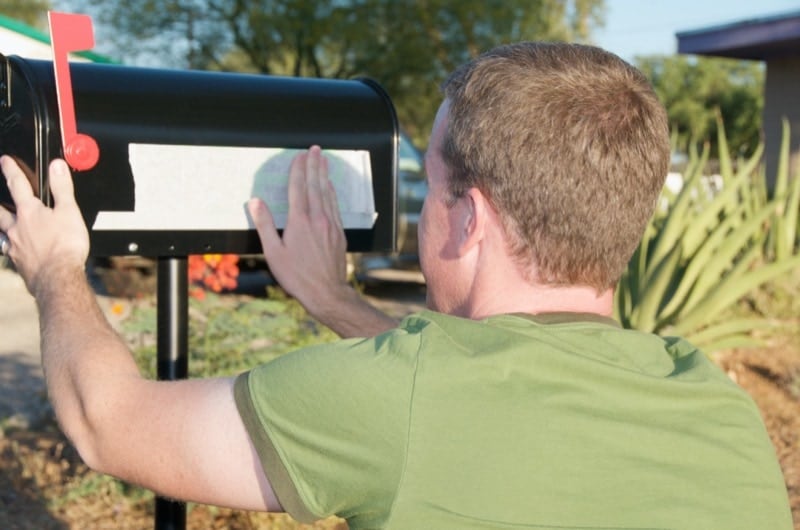
Peel off the number backing and align with tape guide. Press numbers firmly onto mailbox. Apply even pressure along the entire surface.
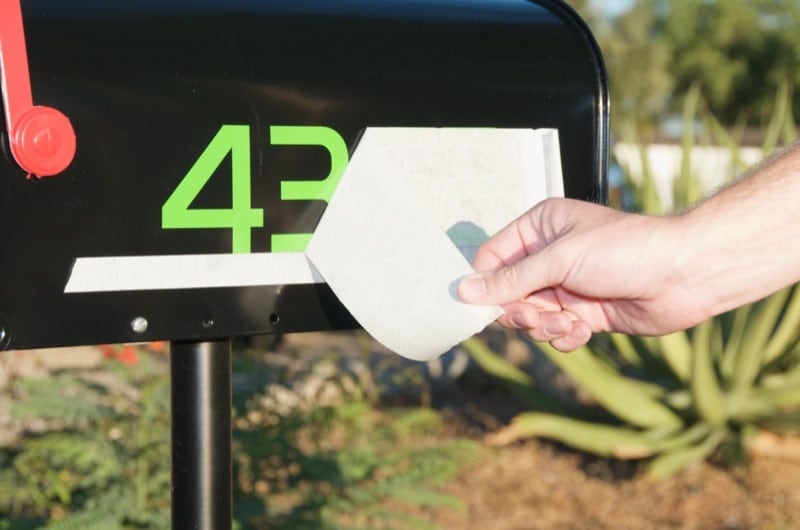
Slowly peel off the clear, front transfer film. Remove tape.
Mailbox Decals Installation
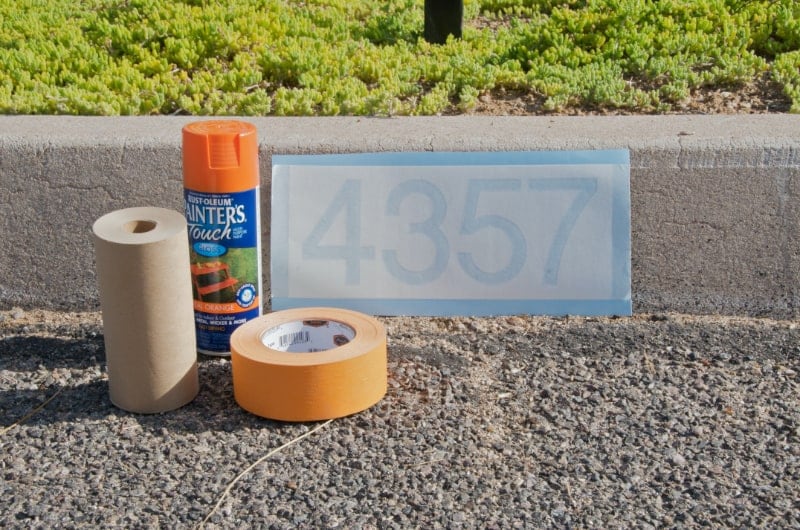
Gather supplies - curb stencil decal, (not included: spray paint, paper roll and masking tape). Note: decal should not be applied on rough surfaces or in wet, freezing conditions.
Clean surface of all loose debris. Peel off number backing. Press stencil decal firmly with even pressure onto concrete at desired location. Peel off the front transfer film. Tape all edges.
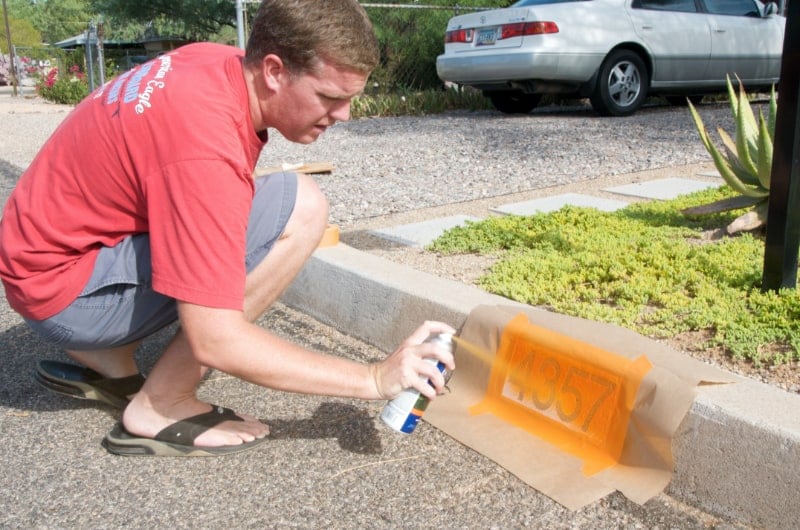
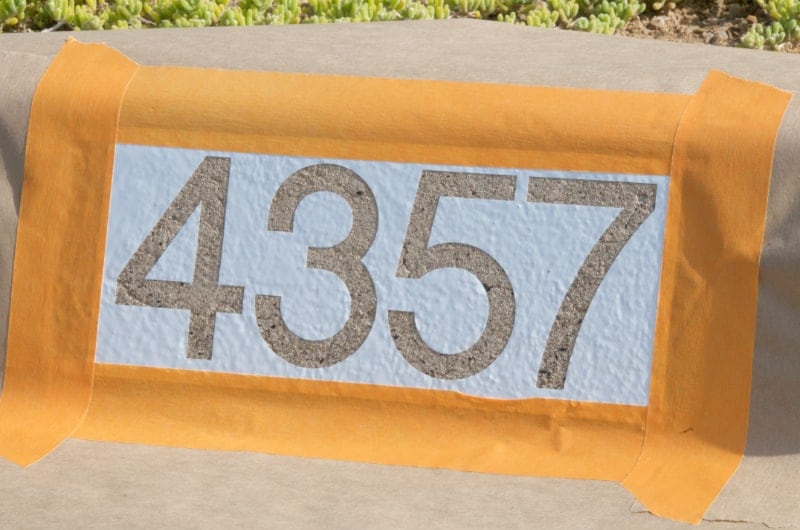
Adequately protect adjacent surfaces with paper. Spray paint stencil using multiple, light coats. Take care not to over spray.
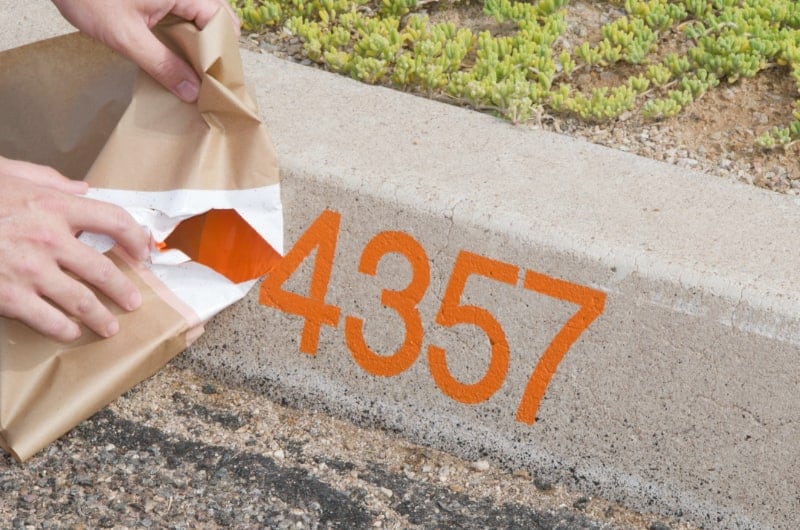
Allow paint to dry. Once dry, slowly remove stencil.
Note: Curb stencil should not be applied in wet or freezing conditions.