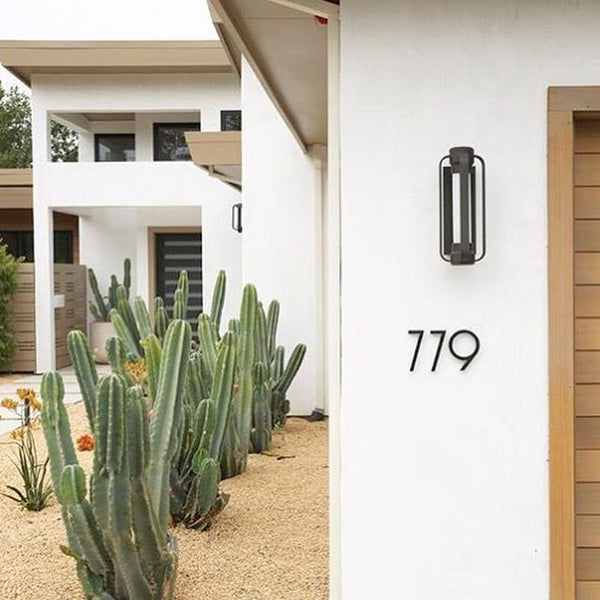
Curb stencils are a practical solution for making your address easy to spot from the street, especially in low visibility conditions or during emergencies. Properly applied house numbers on the curb ensure that first responders, delivery drivers, and visitors can quickly locate your home without confusion. Curb stencils for modern homes considering safety and aesthetics.
For best results, the process involves selecting a durable stencil, prepping the concrete surface to remove debris or old paint, and applying outdoor-grade spray paint in clean, controlled layers. Done correctly, curb stenciling is a low-cost upgrade that enhances safety, improves navigation, and gives your home a polished, cared-for appearance with minimal effort.
Why Are Curb Stencils Important?
Curb stencils are more than decorative elements. They serve a functional role in enhancing visibility and ensuring your home can be quickly identified. Here’s why they matter:
-
Emergency Response: Emergency services like fire, police, and medical responders can locate your home faster.
-
Delivery Accuracy: With online shopping and food delivery on the rise, visible house numbers reduce missed deliveries.
-
Neighborhood Appearance: Clean and well-applied curb numbers contribute to a polished street view.
-
Legal Requirements: Some municipalities may require visible curb numbers for compliance.
Tools and Materials Checklist

Before starting your curb stencil project, gather the following materials. Having everything on hand ensures a smooth process:
Tools:
-
Measuring tape and level
-
Wire brush or broom
-
Masking tape or painter’s tape
-
Drop cloth or old newspaper
-
Stencil brush or foam roller (optional)
Materials:
-
Curb stencil (high-quality)
-
Outdoor spray paint (contrasting color to the curb; weather-resistant)
-
Primer (optional, improves adhesion on older curbs)
-
Clear sealant (UV and weather-resistant)
-
Mild detergent and water
-
Gloves and safety goggles
Choosing the Best Location for Your Curb Stencil

Placement is everything when it comes to applying curb stencils. A well-chosen spot ensures your house number is easy to read at a glance, whether it’s a delivery driver trying to drop off a package or emergency responders looking for your home:
When selecting the perfect spot for your curb stencil, consider these key points to ensure visibility and durability:
-
Proximity to Driveway: Place the stencil directly in front of your driveway or main entrance for easy identification and logical association with your home.
-
Flat Surface: Choose a flat, smooth section of the curb. Avoid areas with cracks, curves, or uneven surfaces that may cause paint to bleed and affect readability.
-
Unobstructed View: Ensure the stencil is visible from the road. Avoid locations blocked by landscaping, trash bins, parked cars, or other obstructions.
-
Municipal Guidelines: Check with local authorities for any rules regarding curb number placement, size, or color. Some areas have specific regulations to follow, helping you avoid potential issues down the line.
Step-by-Step Instructions for Applying Curb Stencils

Repairing your curb and workspace properly will lead to a cleaner, longer-lasting result. Follow these steps carefully to achieve crisp, clear house numbers that will stand out and endure the elements.
Step 1: Surface Preparation
Proper preparation is key to ensuring the longevity and clarity of your curb stencil.
-
Clean Thoroughly: Use a wire brush or sandpaper to scrub away any dirt, moss, old paint, or debris. A clean surface ensures the paint adheres well.
-
Wash the Area: After scrubbing, wash the curb with water and a mild detergent to remove any remaining grime. Rinse thoroughly and let the surface dry completely before moving on.
-
Prime (if needed): If your curb is rough or porous, consider applying a primer. This helps the paint adhere better, especially on older or uneven surfaces, ensuring a smooth and durable finish.
Step 2: Measuring and Aligning the Stencil
Getting the stencil positioned perfectly is crucial for a professional look.
-
Find the Perfect Spot: Use a measuring tape to center the stencil, ensuring it is easily visible from the street and logically placed in front of your driveway
-
Secure the Stencil: Use masking tape to temporarily hold the stencil in place. To make sure it’s aligned properly, double-check its position with a ruler or a spirit level for a perfectly straight and centered design.
Step 3: Mask the Surrounding Area
Protect areas outside the stencil to avoid paint splatters and overspray.
-
Cover Nearby Areas: Use drop cloths or newspapers to cover surrounding areas of the curb, driveway, and sidewalk. This prevents accidental paint marks on unwanted surfaces.
-
Tape Edges: Securely tape down the edges of your stencil and masking materials to ensure the paint won’t bleed under the stencil, giving you clean, sharp lines.
Step 4: Apply Paint
Patience and technique are essential for the perfect curb stencil.
-
Shake the Can: Shake your spray paint vigorously for about 30 seconds to ensure the paint is well-mixed and ready for use.
-
Spray in Short Bursts: Hold the spray can about 6–10 inches from the stencil. Spray in short, controlled bursts rather than a continuous stream to avoid drips.
-
Layer Light Coats: Apply multiple light coats of paint instead of one heavy layer. This reduces the risk of drips and ensures an even application.
Step 5: Allow to Dry and Inspect
Once the paint is applied, it’s important to let it dry properly.
-
Follow Drying Time: Let the paint dry according to the manufacturer’s instructions, typically for 1–2 hours. Be patient—rushing can cause smudges or uneven results.
-
Remove Stencil and Masking: Carefully remove the stencil and masking tape once the paint is dry to the touch.
-
Inspect and Touch Up: Look for any paint bleed or uneven edges. If necessary, use a small brush and a bit of extra paint to touch up small areas.
Step 6: Optional Finishing Touch
For added durability and a polished finish, consider sealing your work.
-
Apply a Clear Sealant: Once the paint is fully dry, protect your curb stencil from the elements by applying a clear, weather-resistant sealant. This will protect the numbers from UV rays, rain, and general wear, ensuring they remain vibrant and legible for months to come.
Maintenance Tips for Long-Lasting Results
A well-applied curb stencil can remain vibrant and legible for over a year—but like any outdoor surface, it needs occasional care to maintain its sharp appearance. Here are some simple, effective maintenance tips to keep your curb numbers looking fresh and functional:
-
Rinse Periodically with Water: Use a garden hose or a bucket of clean water to gently wash away dirt, dust, and debris. Avoid harsh chemicals that can degrade the paint.
-
Inspect Every Few Months: Check the condition of your curb numbers seasonally. Fading, chipping, or discoloration may indicate it’s time for touch-ups.
-
Reapply Paint as Needed: Typically, a fresh coat every 12 to 18 months helps maintain visibility. If your curb gets a lot of sun exposure or foot traffic, you may need to repaint more frequently.
-
Avoid Pressure Washing: High-pressure washers can peel or chip paint. Stick to gentle cleaning methods to avoid damaging the stencil work.
-
Protect from Physical Damage: Be mindful of vehicle tires, garbage bins, or snow shovels scraping against the curb, as repeated impact can wear down the design over time.
By following these simple maintenance practices, your curb stencil will stay crisp, legible, and attractive, improving visibility and curb appeal year-round.
Troubleshooting Common Issues
Even with careful application, a few common issues can arise during or after applying curb stencils. Here’s how to identify and fix them effectively:
-
Paint Bleed or Blurry Edges
-
Cause: Usually occurs when the stencil isn’t securely fixed or the curb surface is uneven.
-
Solution: Always ensure the stencil is firmly taped down on a flat area. Apply light, even coats of spray paint instead of heavy passes. You can also press the stencil edges down firmly or use painter’s tape to seal gaps.
-
Faded or Dull Colors
-
Cause: This typically results from using indoor or low-quality paint, or skipping a clear sealant.
-
Solution: Use weather-resistant, exterior-grade spray paint, and finish with a UV-protective sealant for longer-lasting color.
-
Crooked or Misaligned Numbers
-
Cause: Rushing the alignment or skipping measurements before taping the stencil.
-
Solution: Measure and mark the center point of the stencil area beforehand. Use a ruler or spirit level to ensure the stencil is perfectly horizontal before applying paint.
-
Peeling or Flaking Paint
-
Cause: Paint doesn’t stick well if the surface is dirty, moist, or if primer/sealant is skipped.
-
Solution: Make sure the curb is thoroughly cleaned and fully dry before painting. For rough or porous concrete, apply a primer before stenciling and seal the final paint for added durability.
By understanding these common pitfalls and how to correct them, you can ensure your curb stencil looks sharp and lasts as long as possible.
The Curb Stencil DIY Process1. Clean and prep surface thoroughly 2. Align stencil and tape securely 3. Mask surrounding curb area 4. Apply multiple light coats of spray paint 5. Allow to dry, remove stencil, inspect & touch up 6. Optional: Add sealant for durability 7. Maintain with seasonal cleaning and touch-ups |
Frequently Asked Questions
1. Why should I paint house numbers on my curb?
Painting house numbers on your curb enhances visibility for emergency responders, delivery personnel, and visitors. It ensures your address is easy to locate, especially at night or in areas where house numbers may be obscured by landscaping.
2. What materials do I need for this project?
You’ll need number stencils, painters tape, masking paper or newspaper, spray paint (two contrasting colors if using a background), a wire brush for cleaning, and optional tools like a level and measuring tape for precision.
3. How do I ensure the paint adheres properly to the curb?
Start by thoroughly cleaning the curb with a wire brush or damp mop to remove dirt and debris. Ensure the surface is completely dry before applying tape, stencils, or paint.
4. Are there any legal or HOA restrictions I should be aware of?
In some cities, like Los Angeles, painting house numbers on curbs may require a permit unless you’re painting your own property. Similarly, HOA communities may have specific rules or require approval before starting the project.
5. How can I achieve professional-looking results?
-
Measure and align stencils carefully to avoid crooked numbers.
-
Use masking paper to prevent overspray.
-
Apply multiple light coats of spray paint to ensure even coverage and minimize drips.
-
Allow ample drying time before removing stencils and tape
Ready to Begin? Visit Modern House Numbers

Applying curb stencils is a smart, budget-friendly way to enhance your home’s visibility and curb appeal. With proper tools, preparation, and technique, even beginners can achieve professional-looking results that last through the seasons.
For premium-quality curb stencils crafted by architects, explore the Curb Stencil Collection at Modern House Numbers. Designed for clarity, durability, and aesthetic appeal, these stencils help your home stand out while staying compliant and easy to locate.
Take the next step in your DIY journey. Modern House Numbers has everything you need to get started with confidence.